Monday, December 29, 2014

YouTube AVCHD Tips-Upload and Import MTS to YouTube with FLV/AVI format

Summary: This tutorial has all that you want: How to upload MTS to YouTube? Just convert AVCHD MTS clips to YouTube friendly format. Then it would be easy for you to load MTS files onto YouTube.


As you see, the incompatibility of MTS files exists among different video players, video editing software or video sharing site except for few ones. YouTube is one video sharing website that can’t support MTS files well. This is article will teach you how to change MTS to YouTube friendly format(in proper settings as well), so that you can upload MTS clips to YouTube with ease.

Indeed, MTS files aren't a common format that people use to share video online, so it only makes sense that YouTube didn't put full support for it. It's always best to have a little video formatting skill when trying to use YouTube, so you can try a variety of file types until you find the perfect one to use. Base on my own experience, FLV, AVI are YouTube most compatible format.

In order to add MTS to YouTube, the first thing you need do is to convert MTS to YouTube supported FLV/AVI video formats, and then cut the video into individual clips and put them onto YouTube. Indeed, certain excellent MTS to YouTube software like Brorsoft MTS/M2TS Converter for Mac can help you do that.

With this MTS converter utility, you can resolve two basic issues: Convert MTS video to regular .AVI/.FLV compatible for YouTube; divide MTS files into shorter 15 min sections( YouTube has a 15 min limit if you have no account.) And then upload the formatted videos to YouTube form computer. If you are working on Windows, please get Brorsoft MTS Converter. Now I share the step-by-step solution converting/uploading MTS videos to YouTube.

Step 1. Import MTS files

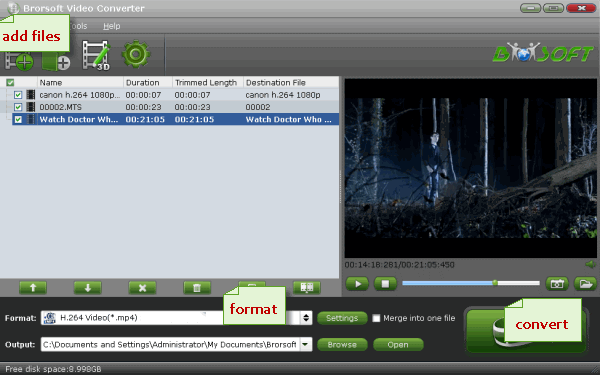
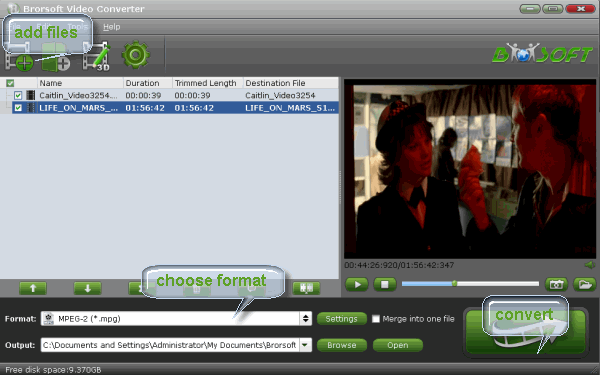
Once you run the program, click “Add Video” button to load your source MTS files. When the MTS files are imported, you can view the videos from the Preview window. Simply select an item and click the “Play” button. When the video is playing, you are allowed to take snapshoot.


Step 2. Select output format

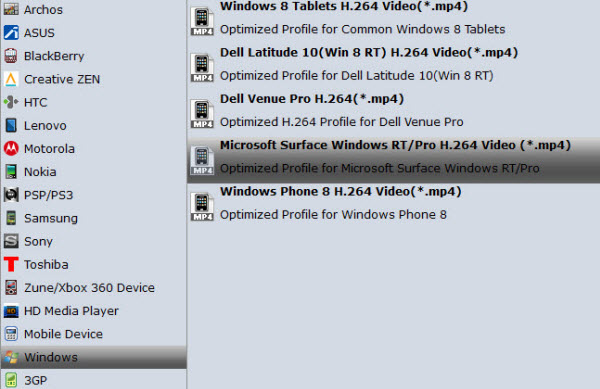
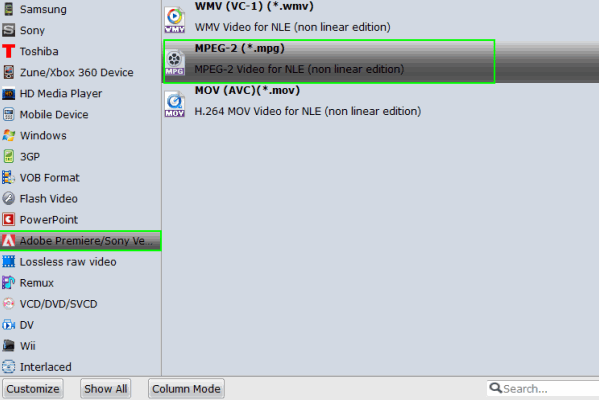
Click Format bar to select an output format. To share your MTS footage on YouTube, .avi, .flv format from Common Video are all the proper formats. You can also press the Settings button to adjust the video size, bitrate, frame rate, audio sample rate, etc to optimize the quality.


Step 3. Edit/Split MTS videos

Click Edit button and you can trim, crop or adjust the video with the built-in video editor to get the very part and effect of the movie you want. If the video clips you’ve trimmed are still longer than 15 minutes, you can click the Split icon in the main interface, and you can cut your files according to time length and file size.


Step 4. Start the conversion

Click “Convert” button to start encoding MTS video to AVI/FLV for uploading to YouTube. After the conversion, click “Open” button to get the exported files and then upload the converted MTS files into YouTube for sharing with your friends, families, and fans.

Editor’s Notes: We found some guys complained the "distortion" when uploading MTS to YouTube. Well it might depend on what you exactly mean by "distortion". Perhaps it's not your file type at all, but rather interlacing that may be the problem. Does this "distortion" perhaps look like the picture has a massive amount of horizontal lines through it every half-second, especially when there's a lot of movement? If so, this MTS to YouTube Converter can be your best help. Click Edit bar and it allows you to deinterlace MTS clips so that you can remove the interlacing artifacts for better enjoyment.

See also:

How to Convert and Edit 3D MTS files
Editing Sony XAVC files in Final Cut Pro 7
How to Convert Sony Handycam files to MP4
How to Convert & Join AVCHD .m2ts/m2ts files
Import Sony XDCAM MP4 footage to After Effects
Best MacTheRipper Alternative for 10.10 Yosemite
Editing DVD VOB files in Premiere Elements 12/11/10
Edit Sony EX3 XDCAM MP4 files to After Effects CS6/CC
Canon EOS Rebel T5i (700D) H.264 MOV files and Avid workflow

Sunday, December 28, 2014

Transcoding AVCHD files for using in Premiere Pro CC/CS6/CS5

Summary: Adobe Premiere Pro CS6, Premiere Pro CC are designed to work with AVCHD format natively to help improve the workflow, but there are still many issues while editing AVCHD files in Adobe Premiere Pro. This page will give some tech support for you.


AVCHD footage is a format used with many of the professional and consumer camcorders on the market today. If you’re working with AVCHD files in Adobe Premiere Pro then these helpful tips should assist with any kinks in your workflow. Actually, importing your AVCHD into Adobe Premiere Pro is not so simple as you image.

AVCHD footage comes in a complex file structure that contains much more information than is typically found in video clips. There are still many potential symptoms while playing, editing AVCHD media in Premiere Pro: unsupported file format, no audio track, video choppy, video freezes up or audio stops…

First of all, we suggest you to always use the Media Browser in Adobe Premiere Pro to import the footage. If it still can’t help you to bring MTS AVCHD to Premiere Pro CC/CS6/CS5/CS4 correctly, get the transcoding tips below. To make AVCHD more compatible with Adobe PP, you can try to convert AVCHD to Adobe Premiere Pro most compatible format like MPEG-2.

To get more options and power for converting your AVCHD .MTS files then you can’t do much better than Brorsoft MTS/M2TS Converter for Mac which will batch convert or re-wrap your AVCHD files at great speed. I’ve used it for a long time and I’ve never had a problem. As long as get this app, you can fast transcode AVCHD to Premiere Pro edit-friendly format with least quality loss.

AVCHD footage to Adobe Premiere Pro Encoding

1. Once run the Mac AVCHD converter, you can click "Add Video" button to load AVCHD MTS source files. Convert supports batch conversion, so you are allowed to add multiple files to convert at a time.


2. Click "Format" drop-down bar to select a proper video format. To edit AVCHD videos in Adobe Premiere, then Adobe Premiere/Sony Vegas > MPEG-2 (*.mpg) is the suitable one.


3.(optional) The Mac AVCHD to Premiere Pro Converter enables users to adjust audio and video settings before transcoding AVCHD files to MPEG-2. Click "Settings" button, then you will enter the following interface, on which you are allowed to customize size, bit rate, frame rate, sample rate, and audio channel to your required ones.

4. Click the "Convert" button to start transcoding MTS AVCHD to MPEG-2 for Adobe Premiere Pro.

When the conversion is finished, you can click "Open" button to get the generated MPG files effortlessly. Now you can import the converted AVCHD files in Adobe Premiere Pro CC/CS6/CS5/CS4 for editing.

Additional Tips: This powerful Mac AVCHD to Premiere Pro Converter also have the ability to transcode AVCHD MTS video to Final Cut Pro, iMovie, Avid Media Composer, etc with the optimal presets Apple ProRes, Apple InterMediate Codec, DNxHD and more.

See also:
How to use MacTheRipper for Yosemite
Convert VOB to Premiere Elements 12/11/10
Get Best CloneDVD Alternative to Backup DVDs
Solution-No Audio from .MTS files in Adobe Premiere Pro
How to get Final Cut Pro Working With Individual .mts/.m2ts
How to Convert and Open Sony 3D AVCHD MTS in iMovie 11
Copy/Rip DVD on Mac 10.10 with MacTheRipper Alternative Yosemite

Thursday, December 25, 2014

Can’t play MKV file using VLC player on Mac Yosemite 10.10- Fixed

Summary: Wonder how to get your VLC Media Player to play MKV on Yosemite? Read on to find the solutions we shared below.


In general, you may get some MKV files and want to enjoy them on a computer. So, how can we play a VLC on Mac Yosemite if there’s a VLC Media Player installed? Can VLC support MKV on Yosemite directly? According some other users and my own experience, it’s not smooth and the VLC always turns to crash. Well, there is a workaround for you. Learn in detail.

Owning to the update of Mac OS, VLC media player is not able to work perfectly on Yosemite until now. What’s more, MKV (matroska) is a general use container, and as such the .mkv files can contain many tracks with different audio and video compression formats, which can cause problems during playback. Even if VLC can run on Yosemite, we’ve sometimes found that MKV can’t be played in VLC due to the codec issues.

Since you cannot play MKV file using VLC on Yosemite, there's really not much you can do except maybe converting MKV to another format. Here comes with Brorsoft Video Converter for Mac, which enables you to convert MKV to a friendly video for VLC for playback effortlessly on Mac OS X Yosemite. Constantly updated to fit with the latest technology, this video converting software is fully compatible with Mac's latest OS X 10.10 Yosemite and can convert any video MKV, AVI, FLV, MPG, MTS, MKV, etc up to 30X faster and without quality loss.

Tutorial: Convert MKV for playback in VLC on Yosemite Mac 10.10

Step 1. Load MKV movies

Run this software and then import your MKV files onto the interface by convenient drag-and-drop feature. You can add several videos for converting at one time as this Mac video converter supports batch conversion.


Step 2. Set output format

Click on "Format" bar to select output format. Here you can choose to encode MKV to .mov, .mp4 for playing with VLC on Mac OS X Yosemite. These formats are also supported well by QuickTime and iTunes in Yosemite.


P.S. This Video Converter for Yosemite also helps you to convert videos to mobile devices supported formats, such as iPhone, iPad, iPod, Samsung Galaxy, etc.

Step 3. Start converting MKV on Yosemite

In the end, you just need to click the "Convert" button start the conversion. When the converting process ends, you can open output folder to check and play converted MKV videos in VLC as well as QuickTime player, iTunes on your Mac Yosemite with the best quality. Enjoy.

Related Guides:

How to Play MXF files with VLC
How to Solve VLC MKV Playback Issues
Handbrake Alternative for Mac OS X Yosemite 10.10
Best Alternative to MakeMKV under Mac OS X Yosemite
How to Enable VLC Media Player to Play Blu-ray movies
An alternative to MakeMKV for ripping BDs in Mac (Yosemite)
Rip DVDs by using Alternative Handbrake software in OS X 10.10

Wednesday, December 24, 2014

Best Way to Play MKV(DTS) on Samsung Galaxy S5/ Galaxy S6

Ever tried to move your MKV movies to Samsung Galaxy S5? In fact, it is easy, fast and worth the effort. This tutorial mainly explains you how to put and play MKV (DTS) on Galaxy S5.

Galaxy S5 offers the most excellent viewing experience a smartphone can offer. Its FHD Super AMOLED display is brighter with more clarity, delivering a deeper and more vivid screen view. Overall, the big 5.1″ screen will be perfect for watching movies.

Portable media players including Galaxy S5 isn't equipped with dts audio playback capability. Sometimes you drag a HD MKV movie to your Galaxy S5 and only got video playback but without sound, even with notable decoders like mx player or mobo player the dts audio still refuses to budge. So, what to do?

There are many video converter software around the market, most of them operates on windows or mac since video conversion is a computing intensive task that demanding more power than what an tablet can provide, so if you are reading this article on your Samsung Galaxy S5, you will need to move to a computer nearby.


Being a professional video converter program, Brorsoft Video Converter is highly recommended to help you finish the Galaxy S5 video conversion task.

Download and install Brorsoft Video Converter(Click here if you are a Mac user, 10.10 Yosemite version included.), which supports to convert MKV DTS to regular file format for mobile devices. Fast and smooth performance. It helps me batch convert 5+ MKV videos to my Galaxy S5 readable MP4 video. It’s freely to adjust the video, audio parameters to get a decent output video that I want. By the way, it provides the optimal presets for iPhone 6/6 Plus, iPad Mini, iPad 3/4, iPad 2. If you own any one of them, just select the certain profile.

How-To| Convert and Play MKV with DTS audio on Galaxy S5/S6

Step 1. Download and install the best Video Converter for Galaxy S5 and launch it to add the video files you want to convert.


Step 2. Click “Format” bar, you can get optimized videos for your Galaxy S5 under “Samsung > Samsung Galaxy S III Video (*.mp4)”. The output videos could fit on Galaxy S5 perfectly.


Step 3. Tap the “Settings” icon and you can adjust codec, bit rate, frame rate, sample rate and audio channel in the interface according to your needs and optimize the output file quality. In usual, 1280*720 video size, 1000~2000 video bitrate is proper for watching on mobile device.


Step 4. Hit “convert” to start converting MKV with dts audio to Galaxy S5 friendly video. Follow the conversion process by the pop-up windows. After the conversion, you can get your Galaxy S5 play MKV DTS files beautifully without any hassle. Enjoy.

More Topics:

Convert Blu-ray to iPhone 6 Plus for playing
Rip and Convert Blu-ray/DVD on Mac OS X Yosemite
Use MKV files in Adobe Premiere Elements 13/12/11/10
Convert DVD/DVD ISO to Kindle Fire HDX 8.9 (2014)
Import AVI(DivX/XviD) files to Premiere Elements natively
Convert videos on Yosemite with Best Mac Yosemite Video Converter

Wednesday, December 17, 2014

How-To| Convert DVD ISO, ISO image files to Surface 2

Simply follow this guide to rip and convert DVD ISO to Microsoft Surface 2 MP4 videos for playing and sharing the movies more conveniently.

Microsoft Surface 2 with Retina Display no doubt adds more fun to your digital entertainment. But when you wanna transfer some personal ISO video files to Surface 2 tablet, you would find the Surface 2 can’t play these videos well or even can’t recognize them.

Some guys suggest to install a media player app for Surface 2, but it’s a pity like the popular video player VLC is still not available on Windows Surface 2 tablet. And the possible solution is to convert ISO videos to Surface 2 compatible format first with a third-party software.

Brorsoft DVD Ripper is a dynamic DVD ripping tool that can help you rip DVD, DVD ISO, VIDEO_TS to Microsoft Surface 2 highly supported MP4 video files with high output video quality and fast ripping speed. Besides, you are allowed to edit the DVD movies by trimming, cropping, adjusting video effects, etc. to get the very wanted part and effects as you like. Moreover, this DVD converter can also help you convert DVD to all other popular video formats like AVI, MOV, MKV, WMV, FLV, MPG, etc. for playing and sharing on iPhone, iPad, Galaxy Tab, Blackberry, YouTube, Facebook, etc. bypassing the DVD copy protection. The equivalent Mac version is Brorsoft DVD Riper for Mac, which can rip and convert DVD ISO to Surface 2 on Mac OS X. Just get it now and follow the steps below to copy DVD ISO movies to Surface 2 for smoothly playing!

Free download ISO file converter:
(Note: Click here for OS X 10.5)

How to convert ISO to Surface 2

This guide uses DVD Ripper for Window screenshots. The way to finish the task on Mac is the same. So just make sure you ge the right version according to your situation.

Step 1. Add ISO image files

Run the program and click “Load DVD” button to add the ISO files. As you can see, you can also load DVD Folders and IFO files to rip. All added files can be previewed on the right viewing window and you are free to adjust the video volume and take snapshots of your favorite movie scenes.


2. Choose Output Video Format

Click “Format” bar, you can get optimized videos for your surface Pro under “Windows > Microsoft Surface Windows RT/Pro H.264 Video (*.mp4)”. The output videos could fit on Surface 2 perfectly.


Tip: Click the “Settings” icon and you can adjust codec, bit rate, frame rate, sample rate and audio channel in the interface according to your needs and optimize the output file quality.
3. Start the DVD ISO to Surface 2 Conversion

When you are satisfied with all the settings, you can click "Convert" button and let the software do the DVD ISO to Surface 2 MP4 conversion. After the ripping, you can click "Open" to locate the converted MP4 video files and just transfer them to your Surface 2 without limitation!

There, now you know how to get DVD ISO movies onto your Surface 2 so you can watch them on that gorgeous screen. Keep in mind that some of the settings can be tweaked to improve the video quality but it's a balance between quality and size. Using the settings we suggested, a 120-minute DVD encoded to about a 1.3GB MP4 file.

Additional Tips: If you are considering to get a powerful all-in-one tool to convert videos, Blu-ray movies and DVDs to your Surface (2) tablet or Galaxy Tab 3 8.0, Galaxy Tab 2 10.1, Samsung Galaxy S IV, Samsung Galaxy S3, Nook HD, Kindle Fire HD, Nexus 7 or other devices at the same saving time and effort, Blu-ray Video Converter Ultimate will be a nice choice for you. If you are running a Mac, iMedia Converter Mac is the alternative.

Guides & Tips:
How do I Convert MKV to AVI video
Transfer movies from DVD to Google Nexus 9/Nexus 7
Convert Xvid/DivX to iPad Air supported video formats
Guide: Converting MTS to iMovie edit-friendly AIC .mov
Import GoPro Hero4 4K MP4 files to Windows Movie Maker
How to convert and import TS files to ProRes for FCP on Mac
Transcoding MOV/AVI/MP4 to Sony Vegas more friendly video
Put Blu-ray/DVD movies onto Asus Transformer Book Flip TP550LA

Monday, December 15, 2014

4k to Pinnacle Studio-How to Get Pinnacle Studio work well with GoPro 4K footage

To open and edit 4K footage from GoPro Hero4 in Pinnacle Studio smoothly, you will need to transcode GoPro 4K to a more "edit" friendly codec for Pinnacle like MPEG-2.

"I have captured 4k video files with Gopro Hero 4. If I open Pinnacle and locate the mp4 files to edit, it shows up with a big question mark in Pinnacle. If I drag the clip to the time line or storyboard and play the file, I can hear the sound, but there is no image."

"My GoPro Hero record video in .mp4 format, when I try to edit these 4k MP4 in Pinnacle Studio only to get the audio with black screen or get the video without audio."


Pinnacle Studio is one of the most popular video editing software owned by almost everyone, pro-alike and green hand. For users looking for maximum video editing power, Pinnacle Studio 18 Ultimate also offers new 4K Ultra HD Smart Encoding, support for 4K videos(XAVC S). But based on multiple testing, I found working 4K videos in Pinnacle Studio is a heavy and slow process. And as known to all, Pinnacle Studio is compatible with the MPEG-4 files, but H.264 MP4 from GoPro Hero 4, a compressed output format is still not an ideal editing format.

To prepare GoPro HD footage for editing in Pinnacle, the easy option is to convert GoPro 4K MP4 to Pinnacle Studio supported WMV or AVI files.


Brorsoft Video Converter is a professional tool that can deal with GoPro videos regardless in 4K, 2K or HD to MPEG for Pinnacle Studio editing without quality loss. Plus, with the built-in video editor, you can also choose to trim, crop, add watermark to your original videos. Now just download its free trail version and follow the below guide to convert GoPro 4K MP4 for playing and editing in Pinnacle Studio perfectly.

Guide: Best Way to import GoPro 4K files to Pinnacle Studio natively

Step 1: Load 4K videos from GoPro

Run GoPro 4K to Pinnacle Converter and load 4K MP4 clips to it by clicking “Add” button. You can also drag and drop the 4K files to the software directly from your Hard drive.


Step 2: Choose Pinnacle compatible format

Click “Format” bar and choose "Adobe Premiere/Sony Vegas > MPEG-2 (*.mpg)” as output format on the drop-down menu. Of course, you can also choose AVI, MP4, WMV from “Common Video” as the output format.


Tip: You can also click "Settings" to fix the frame rate, bitrate, video size, etc to your needs, that you can play and edit GoPro 4K movies in Pinnacle Studio easily. Generally, 1080p video size is good for Pinnacle editing.

Step 3: Convert GoPro 4K to Pinnacle Studio

Click the convert button under the preview window, the converter will start encoding 4K video from GoPro Hero 3, Hero 4 for Pinnacle Studio.

After the conversion, click the “Open” button to locate converted files, and then you can load the converted GoPro 4K files into Pinnacle Studio 14/15/16/17/18 for editing smoothly with the best quality.

More Guides:

Convert and upload a DVD to YouTube on Mac
Transcode M2TS files to iMovie 08/09/11 on Mac
Converting MTS to iMovie edit-friendly AIC .mov
How to import GoPro 4K videos to Pinnacle Studio
How to import footage from DVD to Final Cut Pro
Encoding MP4 files to MPEG-2 for Pinnacle Studio
Convert and Import WMV files to Pinnacle Studio
Tutorial:Converting MTS to Adobe Premiere Elements
Converting WebM format to MPEG-2 for Pinnacle Studio editing

Monday, December 8, 2014

Premiere and MOV- How to open Canon EOS Rebel T5 MOV files in Premiere

Summary: This article will teach you how to convert Canon EOS Rebel T5 H.264 MOV to Premiere native format MPEG-2, so that you can import and edit MOV files in Premiere.


Canon EOS DSLR cameras takes up a lot space on the camera market. Now, Canon's new entry-level DSLR, the EOS Rebel T5, is an upgrade from the now discontinued T3. As previous Canon EOS DSLR models, Canon EOS Rebel T5 also records videos at full HD 1080p in H.264 MOV format. With it, users can easily capture high quality photos as well as videos. However, as a videographer, did you meet the problem while trying to edit Canon EOS Rebel T5 H.264 MOV in Premiere? If so, follow this article below to learn how to open Canon EOS Rebel T5 MOV files in Premiere easily.

As a matter of fact, H.264 codec is not an ideal codec for editing, it is mainly a playback codec. In addition, from Premiere official website, we can learn that MPEG-2 is the best compatible video format for Premiere. Under this circumstance, you need to rewrap Canon MOV videos to MPEG-2 first before linking them into Premiere for further process. At this moment, a powerful third party program is necessary.

To save your time, here we recommend you a best program named Brorsoft Video Converter for Mac. In general, this program is designed to transcode videos from Canon EOS Rebel T5 MOV to Premiere or other NLEs without quality loss. Besides Canon MOV format, this video convert program can also deal with various popular video formats including AVI, WMV, MP4, MKV, FLV, VOB, MTS, MXF, etc as you need. If you're using a PC, simply get the equivalent Brorsoft Video Converter to encode Canon EOS Rebel T5 MOV to Premiere Pro on Windows. Now download the software on your computer and follow the guide below to start Canon EOS Rebel T5 MOV to Premiere conversion.

How to Convert Canon EOS Rebel T5 H.264 MOV in Premiere

Step 1. Transfer h.264 encoded .mov files from Canon T5 camera to computer.
Download Video Converter for Win/Mac from Brorsoft and run the software as the best Canon MOV converter. Click the "Add" button to load .mov videos from Canon EOS Rebel T5.


Step 2. Click format bar to choose the format for output. Select "Adobe Premiere/Sony Vegas > MPEG-2 (*.mpg)" as the compatible format for Premiere importing.


Tip: Go to "Settings" page, then you will be able to adjust audio and video parameters on the popup window to customize the output file quality, these adjustable parameters include codec name, aspect ratio, bit rate, frame rate, sample rate, and audio channel.

Step 3. Tap "Convert" icon to transcode Canon EOS Rebel T5 MOV files to MPEG for Premiere.
Once the conversion is finished by Canon MOV to Premiere Converter, you can get the output files effortlessly via "Open" panel. Launch Adobe Premiere, choose "File > Import" to load the converted MOV files for further editing.

Read More:
How to Edit Canon MOV in FCP
How to convert WMV to iTunes freely
How to Convert Canon MOV for iMovie
How to Import Canon MOV in Windows Movie Maker
Solution to Canon EOS 7D Mark II MOV error in Sony Vegas
Import Canon EOS 7D Mark II MOV files to Premiere Pro CC/CS6