Wednesday, January 28, 2015

Alpha 7S to Final Cut Pro - Natively Edit Sony a7s footage in FCP 7/X with ProRes codec

The following will introduce a powerful FCP Converter and provide a step by step guide on how to import XAVC-S file from Sony Alpha 7S (a7s) to FCP 6/7 and Final Cut Pro X on OS X Yosemite (10.10) with almost no loss of video and tone quality.

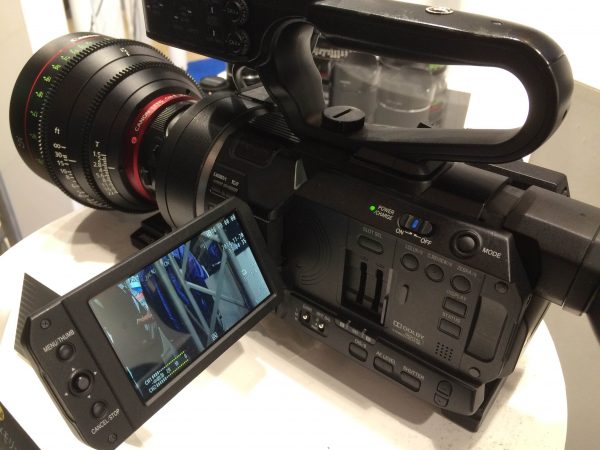
Sony's newly announced a7S is a versatile camera that lets you internally record videos in 50Mbps XAVC S 1920x1080 at 60P. Plus, in XAVC S video mode, the a7S can output uncompressed QFHD 4K video (3840 x 2160) in 8-bit 4:2:2 to an optional external 3rd party 4k recorder via HDMI. While, there are a few issues when it comes to view, load and edit Sony a7S XAVC S in Final Cut Pro. Some tricks for Sony a7S to Final Cut Pro 7/X best workflow are listed below.


As we mentioned above, the a7S uses XAVC S recording format. At present XVAC-S, a long GOP inter-frame codec, does not appear to be supported by FCP X, although I do not know that from personal experience. Apple does not respond on these forums and no one here knows or can say when, if ever, XVAC-S will be natively supported by FCP X. To edit Sony a7S XAVC S footage in FCP X or FCP 7 smoothly, a suggestion is to use Brorsoft Video Converter for Mac to transcode "XAVC S" to "ProRes", which is a friendly format supported by FCP.

With it, you can effortlessly transcode Sony a7S XAVC S files to Apple ProRes - ensuring maximum editing quality and efficiency when working with Final Cut Pro (no matter Final Cut Pro X, FCP 6 or FCP 7). The conversion is darn easy to be finished with only three clicks without loss of video quality. Click the Download button below to get the program and check out the easy steps to convert and import Sony a7S XAVC S videos to Final Cut Pro without any troubles.

Tutorial on converting Sony A7S XAVC S to Final Cut Pro 7 in simple steps

Step 1. Launch the XAVC S to ProRes Converter on your Mac, then click the adding button to import your XAVC S flies from HD drive or your camcorder directly.


Step 2. Click the Format bar to get the drop-down menu and you can get the Apple ProRes codecs, including ProRes 422 (HQ), ProRes 422, ProRes 422 (LT), ProRes 422 (Proxy) and ProRes 4444. Choose the proper one you want.


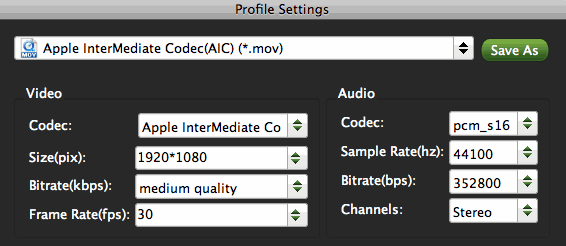
Step 3. Press the “Settings” icon and you’d better set the video frame rate as 30fps, video size as 1920*1080 for editing Sony HDR-AS100V footages in FCP 7 with best quality.

Step 4. Hit the Convert button in the main interface to start the XAVC S to FCP ProRes conversion on Mac OS X.

After the conversion, you can run the Final Cut Pro and click File --> Import --> Files to import the converted files and edit them in FCP without any rendering or unrecognizable problem.

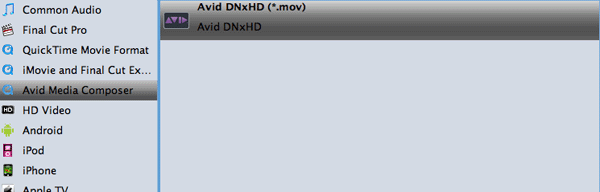
P.S. If you want to make your Sony Alpha 7S XAVC S files editable in iMovie, FCE, Adobe Premiere, Avid Media Composer, etc. the Mac XAVC S Converter will also be a great choice for you. Choose a proper output format like “iMovie and Final Cut Express-Apple InterMediate Codec(AIC)(*.mov)” for iMovie in the second step.

More articles:

The easy way to share 4K videos on YouTube
How to Import WMV to iTunes on Mac/PC Flawlessly
Converting MTS to ProRes for Editing in Final Cut Pro
Sony HDR-AS100V to Adobe Premiere Pro CS6 workflow
Can I import DivX/XviD codec files to Adobe Premiere Pro
Convert Sony F65 4K video for Editing in Final Cut Pro X/7
Quickly import Canon XA10 video to Final Cut Pro X (FCP 6/7)
2K/4K/HD XAVC files on Sony F55/PMW-F5 work with FCP X/7/6
Converting Sony AS100V XAVC S to Final Cut Pro 7 in simple steps

Sunday, January 25, 2015

Editing Sony PMW-300 50Mbps MXF and XAVC videos with Avid MC under Mac OS X(Yosemite)

When you want to import Sony PMW-300 MXF files to Avid MC or import XAVC to Avid Media Composer for editing, you’ll find the video files turn grey and can’t be added. What to do? How to solve the problem? Here you’ll find an easy solution.

Sony’s PMW-300 XDCAM camcorder is the first semi-shoulder mount camcorder to combine the benefits of 1/2-inch type Exmor Full HD 3CMOS sensor technology with 50Mbps HD recording at MPEG HD422, meeting broadcast standards around the world. The high bit rate ensures excellent capture of fast moving objects, while its chroma subsampling feature is perfect for a wide range of video recording situations. Also , the camcorder is upgradable to support Sony’s XAVC codec on 2014.

The XDCAM HD422 video footage is wrapped in an MXF container, which is can not natively imported by many professional video editing application including the Avid Media Composer. And the XAVC video included in PMW-300 is not compatible with NELs just like from Sony F5/F55. So, it will be a bit hard when importing Sony PMW-300 video footage with Avid MC.


While, things can be different if you get some help from third-party software Brorsoft Video Converter for Mac.

Overall, the program is a professional yet easy-to-use MXF/XAVC Converter on Mac OS X, which can not only convert Sony PMW-300 MXF/XAVC files to DNxHD codec videos for Mac editing, but also provide simple video editing functions for you. This Mac MXF/XAVC Converter can also transcode MXF videos from Canon C300 XF100, XF105, XF305, Pansonic P2 cameras for editing in Final Cut Pro 6/7, Final Cut Pro X, Final Cut Express, iMovie, Avid MC, Adobe Premiere Pro, etc on Mac OS X(Mavericks and Yosemite included). Just download it and follow the tutorial below to get the work done.

Guide: Transcoding Sony PMW-300 MXF/XAVC files for editing in Avid Media Composer on Mac

Step 1: Import video files from your Sony PMW-300 to the MXF/XAVC to Avid MC Converter Mac.

Note: Before conversion, you need to transfer MXF files from your Sony PMW-300 to Mac Hard Drive, then click the "Add files" button to browse to import MXF videos.


Step 2: Click on "Format", and select output format from the drop-down list. Follow "Avid Media Composer" > Avid DHxHD (*.mov)”.


Step 3: Click "Convert" button to start converting Sony PMW-300 mxf, xavc files to Avid DHxHD .mov for Media Composer under Mac OS X.

Tip:Some more helpful features of the Mac MXF/XAVC to MOV Converter:

1. Settings- Click "Settings" button if you’d like to customize advanced audio and video parameters like Video Codec, aspect ratio, bit rate, frame rate, Audio codec, sample rate, audio channels.

2. Editor (next to "Add" icon)- click to set deinterlace, denoise, mute, volume up, trim, crop, etc.

Once the XDCAM MXF/XAVC Mac conversion is done, you can transfer Sony PMW-300 MXF/XAVC footage into Avid Media Composer 5/5.5/6/6.5 for editing smoothly on Mac with ease.

If you have problems when importing or editing your Canon, Sony, Panasonic etc, camera video files, you can check out "Brorsoft Camcorder/Camera Importing Tips" or "FCE, FCP, iMovie Column" to get your solutions.

More Topics:

Using Canon H.264 MOV files in Premiere Pro
Importing DivX(AVI) into Windows Movie Maker
Make DivX/Xvid files work in Premiere Pro CC/CS6
Import PMW-300 MXF to AIC MOV for iMovie/FCE
Importing and editing XviD in Windows Movie Maker
Importing Sony EX3 MP4 files to Avid Media Composer
Editing Sony A5000/A6000 MTS to AIC .mov for iMovie
Make Canon Full HD MXF Accepted by Avid Media Composer
Make Sony AVCHD editable in Adobe Premiere CC/CS6/CS5/CS4
Best Sony F65 4K MXF workflow in Adobe Premiere Pro CC/CS6/CS5

Thursday, January 22, 2015

Sony a6000/a5000 tips in iMovie-Editing Sony A5000/A6000 MTS to AIC .mov for iMovie on Mac (Yosemite)

In this article you will get the best workflow to import Sony A6000/A5000 AVCHD MTS files into iMovie and edit with native supported AIC .mov codec.

A5000: For beginners looking to upgrade from their point-and-shoot, searching for an affordable mirrorless camera and don’t mind making compromises, as long as the image quality as good, the camera is small and handy and all that for an affordable price.

A6000: For both advanced photographers (or if upgrading from an entry-level model), looking for a highly-capable mirrorless camera, and don’t mind paying more in favor of a viewfinder, better AF system, higher-res LCD, might take advantage of the Multi-interface shoe and very fast burst speed.

Movie Format: AVCHD 2.0 / MP4

Video Compression: AVCHD: MPEG-4 AVC/H.264, MP4: MPEG-4 AVC/H.264

The Sony A5000/A6000 can both record videos saved in the MTS extensions of the AVCHD format (Press the MOVIE button to start recording beautiful movies that are notable for their sharpness and lack of visual “noise”—in your choice of 60p/50p, 60i/50i or 24p/25p*) . But you will be disappointed when you import footage from Sony Alpha A6000/A5000 to iMovie for further editing and find all 60p MTS files are greyed out.


There are mainly two reasons why you can not transfer video files from Sony A6000/A5000 to iMovie, including iMovie 8/9/11. Firstly, the recordings with the codec H.264/MPEG-4 are highly compressed for saving storage space and smooth playback, but the H.264 files are not suitable for editing, so editing H.264 MTS files in iMovie is always a headache for editors. Secondly, up to now, iMovie can not always successfully recognize footages at 60fps (60p). So if you want to ingest 60p AVCHD footage to iMovie, you will sometimes meet the importing problem.

Well, no worry. Here I’d like to show you an easy way to fix the issue. Since Apple InterMediate Codec(AIC) is the most compatible codec introduced by App which ensures maximum editing quality and efficiency when working with iMovie, the common practice for working Sony a6000/a5000 MTS with iMovie is, get a Mac MTS to iMovie Converter and transcode Sony a6000/a5000 .mts footage to AIC MOV, which will save you both time and trouble. All you need is to drag the result videos for prompt editing.

This Mac AVCHD Converter comes with supports for a wide range of video editing software and media devices, including iMovie, Final Cut Express, Adobe Premiere Pro, Avid Media Composer, Final Cut Pro and. It helps you convert Sony as well as Panasonic, Canon AVCHD recording to any editable format like AIC. mov, MPEG-2, DNxHD, ProRes, etc as you need without any quality loss. Overall, the program is an easy-to-use yet professional app which can be used a Mac AVCHD MTS Converter under OS X Leopard (10.5), Snow Leopard (10.6), Lion (10.7), Mountain Lion (10.8) and Mavericks(10.9), Yosemite(10.10). It is free, clean and safe to install and use.

The Steps: Converting Sony A5000/A600 MTS to iMovie 11/10/09/08
1. Launch the top Sony MTS Converter for Mac, load .mts files from your Mac hard drive backed up from your Sony A5000 or A6000 and then click "Format" to choose "iMovie and Final Cut Express > Apple Intermediate Codec(AIC) (*.mov)" as output format which is the best compatible video format you need for iMovie.


2. Click the "Settings" icon to make the best settings for editing Sony A5000/A6000 MTS in iMovie on Mac. You can set the video frame rate as 30fps, video size as 1920*1080 to keep the best output quality.


3. Start the MTS to AIC MOV conversion by pressing the big "Convert" button.

After the conversion, you will be able to get the output files compatible with iMovie effortlessly. So there you have it. Pretty Simple! Now you can effortlessly import Sony Alpha a5000/a6000 mts footage in iMovie 09/'11 without problems.

Additional Tips:
If you want to edit Sony a5000/a6000 MTS clips in Final Cut Pro X or FCP 7/6, you just need to choose the "Final Cut Pro > Apple ProRes 422 (*.mov)" as output format in the second step; For Avid Media Composer, choose "Avid Media Composer > Avid DNxHD(*.mov)" as output; For Adobe Premiere Pro or Vegas Pro, choose Adobe Premiere/Sony Vegas> MPEG-2(*.mpg) as output.

See also:
MKV movie won’t play in iTunes 12- Solution
How to Rip Blu-ray/DVD/ISO to Sony Xperia Z3
Import PMW-300 MXF to AIC MOV for iMovie/FCE
How to transcode Canon MXF to Avid Media Composer
How to Import and Edit GoPro MP4 videos in Aperture 3
Canon DSLR MOV to Adobe Premiere Pro Best Workflow
Best Sony F65 4K MXF workflow in Adobe Premiere Pro CC/CS6/CS5
Editing Lumix DMC-ZS30/TZ40 AVCHD in Avid Media Composer
Fix Premiere Pro (CC) missing audio tracks for Panasonic ZS40/TZ60

Tuesday, January 20, 2015

ISO to AVI conversion- How can I change DVD ISO to AVI video

Get the quick and easy way to convert your DVD ISOs to AVI files? Here I will provide the best solution to get the job done very well.

Source From: How to Transcode DVD ISO to AVI for playing

If you have some DVD ISO image files downloaded from the Internet or ripped from a DVD disc, you’re probably eager to change the ISO format to AVI or some other format, so that you can easily share the movies or play the movies on some media players.

I just wanna play ISO files on computer with Windows Media Player or edit ISO files with Adobe Premiere, Sony Vegas, Pinnacle Studio, etc. without problem, then find the direct way for you to follow is to find a powerful third party program online to encode DVD ISO files to AVI or other playable (editable) formats.

To save time, Brorsoft DVD Ripper is highly recommended here as the best DVD ISO converting program to help you get the work done.With it, you can effortlessly convert DVD ISO files to MP4, MOV, WMV, AVI, MKV, FLV, VOB, etc. for using in any regular media players. In addition, you can transcode your DVD ISO into NLEs with professional codecs in software presets, like DNxHD for Avid, MPEG-2 for Premiere .etc. If you're using a Mac, just get Brorsoft DVD Ripper for Mac on Mac. Now download the right version and follow the step-by-step guide below to finish your task.

How to Convert DVD ISO to AVI format

STEP 1. Run DVD Ripper and click "Load" icon to add ISO files to the program. DVD disc, DVD folder, IFO file are also supported here.


STEP 2. Click Format bar to get the format list and select a AVI format in "Common Video" column. This DVD ripper also allows you to convert DVD files to all other regular video formats like MP4, MOV, MKV, MPG, WMV, etc. and portable devices like iPhone, iPad, iPod, etc.


Settings: Before conversion, you can click "Settings" to change the video encoder, resolution, frame rate, etc. as you need.

STEP 3. After settings, tap the "Convert" button on the main interface to begin converting DVD ISO files to AVI videos.

When the conversion completes, you can tap "Open" to locate the output AVI files. Now, you can play and share encoded DVD ISO movies without any issue.

Read More:
Simple way to edit AVCHD files in FCP X/7
Get VOB files editable in iMovie 11(Yosemite)
Loading AVI files into Windows Movie Maker
How to Rip DVDs to M4V on Mac for Apple TV
How to Load MOV to Pinnacle Studio 15/16/17.5
Convert VOB to AIC .mov for editing with iMovie 11
How to Rip, Convert and Backup Blu-ray Effortlessly
Streaming DVD, DVD ISO movies to ATV in the easiest way
Solve Panasonic AVCHD incompatiblity with Premiere Pro CC/CS

Sunday, January 18, 2015

EOS 700D to Adobe Premiere - Solution with Importing .MOV files from Canon 700D to Mac Premiere Pro CC/CS6

In this article, you will learn how to successfully import Canon EOS 700D H.264 MOV recording to Adobe Premiere Pro CC/CS6.

Canon 700D is an ultra-compact, highly versatile camera that will appeal to a wide spectrum of independent videographers including corporate video makers, wedding and event video producers and more. However, you may face a problem when trying to transfer Canon EOS 700D footage to Mac tools like iMovie, Final Cut Pro, Premiere Pro.

I just use the Adobe Premiere Pro CS6 to edit video clips, however, the H.264 video from the EOS 700D is a delivery codec rather than editing code, so i need to transcode H.264 footage to a more friendly format MPEG-2 *.mpg for Premiere Pro. Follow below quick tutorial up on how to transcode Canon 700D MOV to MPEG-2 for editing flawlessly with Adobe Premiere on Mac OS X (Yosemite included).


Download and install the app Brorsoft Video Converter for Mac

It is a top MOV Converter for Premiere Pro. It supports encoding all Canon DSLR MOV files to MPEG-2 so that you can easily import the Canon MOV to Adobe Premiere for editing on Mac. This will help you import the file correctly and saving the rendering time. Plus, it can also transcode Nikon/Canon MOV footage to Apple ProRes .mov for FCP, Apple InterMediate Codec for iMovie/FCE, NDxHD .mov for Avid MC. If you want to solve the Canon MOV incompatibility problems on Windows PC, please turn to Brorsoft Video Converter.

Below is a step-by-step guide on how to convert Canon D700 MOV to MPEG-2 for Adobe Premiere editing with Mac OS X like Mountain Lion, Maverick, Yosemite.

Step 1: Launch this Canon MOV Converter for Mac. Import D700 footage to the converter. You can join several video clips together by checking the “Merge into one file” box.


Step 2: Click Format bar to choose the output format. For importing Canon D700 media to Premiere Pro, please select Adobe Premiere/Sony Vegas > MPEG-2 (*.mpg).


Step 3: If need, you can click "settings" to customize the output parameters, adjust the resolution, bitrate for easy editing with Adobe Premiere Pro.

Step 4: Click convert button to start transcoding Canon 700D MOV files to Premiere Pro for editing.

After the short MOV to MPEG-2 conversion, you can import the Canon 700D videos to Adobe Premiere Pro CC/CS6/CS5 for editing smoothly without rendering or any other issue.

Related Guides:

Loading AVI files into Windows Movie Maker
How to Transcode DVD ISO to AVI for playing
How to transfer Sony PMW-EX3 MP4 to FCP X
Transcode AVCHD to Apple ProRes for FCP X/7
Import P2 MXF for Editing in Avid Media Composer
Convert VOB to AIC .mov for editing with iMovie 11
Converting Sony AVCHD video to edit in Premiere Pro
Solve Panasonic AVCHD incompatiblity with Premiere Pro CC/CS
Make Sony AVCHD editable in Adobe Premiere CC/CS6/CS5/CS4

Monday, January 12, 2015

Tivo Shows play in MPG Format-Simple way to Change Tivo file to MPEG video

Follow the steps below to easily convert TiVo files to MPEG video(mpeg-1, mpeg-2, mpeg-4).

Source From: Convert Tivo File into MPEG Without Losing Quality

TiVo is a brand and model of digital video recorder which works just like any other digital recorder. However, the recorded TiVo files usually are not compatible with most media players we adopt.

Q1: I have TIVO and I have downloaded some programs, using TIVO Desktop, onto my computer. The thing is, I want to be able to view these programs onto my laptop, but I can not burn a DVD with the TIVO format. Is there anything I can do to convert it? Thanks!

Q2: I have recently exporting a TV show from my TiVo to my PC using my TiVo home network, but the file is in .TiVo format. Does anyone know the best way to convert this to a avi file or mpeg?

From the quoted words, we can get clue that most guys wanan a simple way to change TiVo files to MPEG video for easy playback or burning. And in this article, I will outline a method to help those guys including you achieve the goal.

In fact, Tivo is an encrypted video format. Based on its specificity, few media players can play it well and some freeware can’t handle it also. Here Brorsoft TiVo Video Converter is the optimal solution for you. It enables you batch convert TiVo files to MPEG-1, MPEG-2, MPEG-4 video without quality loss. In fact, this TiVo Converter is an all-in-one video convert app.

It can also help you quickly convert TiVo to MKV, AVI, WMV, MOV, MP4, etc popular format. You could get wonderful output files and never worry about out of audio/video sync.

Note: If you are running on Mac, please turn to its equivalent Mac version TiVo Converter Mac.

And the full tutorial would be divided into two parts: Part 1. Transfer TV shows from TiVo to PC; Part 2. Converting TiVo to MPEG. Learn the details.

Part 1. Transfer TV shows from TiVo to PC

Launch TiVo Desktop software on your PC. Connect TiVo to your home network, and then the TiVo Desktop will provide you with a list of shows for transferring to your PC. Then please transfer the TiVo TV shows you want to PC. Once all the shows you selected have been downloaded from your TiVo, they will appear in the Now Playing list in TiVo Desktop.

Part 2. Converting TiVo to MPEG

Step 1: Start up this program, and then click “Add” to import all .tivo files.

Tip: When first loading, Brorsoft TiVo Converter will ask you to input your Media Access Key. Simply enter your Media Access Key, and click "OK" to confirm.


Step 2: Choose the MPEG as output format. Click Format bar and MPEG-1, MPEG-2, MPEG-4 are provided for you in Common Video profile list. To adjust video and audio parameters like codec, aspect ratio, bit rate, frame rate, sample rate, you could click on "Settings" button.


Tip: If you want to convert TiVo to mpeg-4 (*.mp4) for your Galaxy Note, Asus Infinity, Nook Tablet, etc with best settings, please choose the specific profiles the software has preset as output format and get the suitable settings.

Step 3: Start converting TiVo to MPEG format

Click Convert button to start TiVo to MPG conversion. The conversion process will take a while, and you’ll see an encoding progress bar.

Once finished, click the Open button in the main interface and you can locate the encoded TiVo files effortlessly. And then you are able to use these files as you want for your portable devices, PC, media player or video editing programs.

More Guides:

Edit Sony FS700 footage in Final Cut Pro 7/X
Edit H.264 AVI files in Pinnacle Studio 14/15/16
Ripping Blu-ray Collection to Mac Yosemite for free
Get a Best GoPro Studio Alternative for GoPro Users
How to open Nikon D600 MOV in Premiere Pro CC/CS6
Import unsupported MOV files into iMovie on Mac Yosemite
How to convert MOV to ProRes 422, 422HQ, ProRes 444 for FCP 7
Tips and Tricks How to convert from DVD to MPEG in a simple way

Sunday, January 11, 2015

QT Alternative on Yosemite-QuickTime doesn't work on Yosemite? Resovled (10.10 Yosemite Supported)

QuickTime can’t play some media files on Yosemite? Ok, check here to let your QuickTime play all formats on Mac OS X Yosemite.

Why QuickTime can't support as many formats as possible? After updating to Yosemite, I can't play AVI or WMV videos on Yosemite with Perian as uaually.
Actually, Apple has disabled 3rd party extensions. QuickTime has become useless for a large amount of media formats.AVI isn't native to Mac, and Perian hasn't been updated for Yosemite support. That means Perian isn't available for Yosemite or Mavericks now.

I have a reliable way that can make your QuickTime play all formats on Yosemite at once. The solution is to find a QuickTime Pro Alternative for Yosemite - Brorsoft iMedia Converter for Mac. It can convert any video and audio formats into any format you want.For QuickTime lovers, it’s absolutely can’t-miss QuickTime Yosemite component. It really makes QuickTime the only one application that can play all of media files with the original video & audio effects.

It also has a user-friendly interface so you are not going to have any problems about using it. Conversion is literally as easy as ABC! Below are the 3 steps you have to follow in order to convert your file using Brorsoft iMedia Converter for Mac successfully.

Step 1: Download and Install Brorsoft iMedia Converter for Mac
Download the program from below. This is a free trial version that you can use forever. The download and installation process is really quick, it only takes few minutes and it is done.


Step 2: Select the Output Format You Want For Your Files

The next thing you have to do is to choose the output format for your video file, and to do this, just open the output format list of the software you can do this by clicking the Format bar at the bottom part of the software's pane. You will get a list of extension files and devices you can convert your media file to, just choose the one you like. Make sure that it's going to play on the media player you are going to use to play your video.


Tip: You can simply click the Edit button to enter the editing mode. You could trim or crop your videos directly using this program. In addition to that, you can also add watermarks or captions on your video if you want. There are a lot of different effects available for you to choose from as well in order to enhance the visualization of your videos.

Step 3: Convert Your Video Files on Yosemite

Simply click the "Convert" button to begin the conversion on Yosemite. After that, the conversion will begin. There is a progress bar where you will see the progress of the conversion, it usually just take a few minutes to finish, depending on the size of the file you are trying to convert. And it's done!

More Topics:

Convert 4k video to QuickTime for playing
Edit DVD videos in Final Cut Pro under Yosemite
Ripping Blu-ray Collection to Mac Yosemite for free
Convert Tivo File into MPEG Without Losing Quality
Convert/Import Nikon D5200 MOV files to FCP X/7/6
Main interface of the AVCHD to FCP Converter Yosemite
Edit Nikon D5500 MOV(H.264) file in Final Cut Pro 6/7/X
Transcode and import Panasonic AG-AC90 MTS in FCP X/7
Tips and Tricks How to convert from DVD to MPEG in a simple way

Tuesday, January 6, 2015

4K image videos in Avid MC-Importing Panasonic hc-x1000 4K/MOV/MP4 files to Avid Media Composer

Confused in converting Panasonic HC-X1000 4K Videos to Avid Media Composer for editing or playing on Mac (Yosemite) and Windows (Widows 8.1)? Read on to learn details.

Panasonic HC-X1000E (HCX1000E) 4K Ultra HD Camcorder with Leica Dicomar Lens, records 4K 60p/50p onto SD card
The HC-X1000 is a full-fledged 4K camcorder supporting various recording formats, like 4K/Cinmea 4K/Full-HD, frame rates including 60p/50p/24p and a host of professional functions. Its 4K resolution produces stunning, lifelike images, and its compact body adds agile mobility. Idea for professionals shooting documentaries and events.

Versatile recording formats and bit rates prepare HC-X1000 for use in a wide range of applications. The AVCHD recording format is joined by MOV and MP4 for quick and easy editing. Full-HD recording employs all-intra compression for a maximum bit rate of 200Mbpa. This brings outstanding quality to image production. Works with Final Cut Pro X.

I have got a Panasonic HC-X1000 for days. Just curious if people have been able to work with the HC-X1000 4K/AVCHD in Avid Media Composer natively yet.Is there anybody that has found a fast reliable workflow that actually saves time? Is there conversion software that will actually use all available processor cores and available memory to make this process go fast?


On Avid official website, it recommends DNxHD or XDCAM codec for editing, and DNxHD codec is the first choice. To edit 4K/MOV/MP4 files from HC-X1000E in Avid Media Composer smoothly, what I’ve figured out is that the best solution is to transcode Panasonic 4k video format to DNxHD codec, which ensures maximum editing quality and efficiency when working with Avid Media Composer. For this purpose, this article will show you how to convert Panasonic HC-X1000E to DNxHD .mov in detail.

The quick workaround is to use the easy-to-use yet professional app called Brorsoft Video Converter for Mac. With it, you can effortlessly transcode Pamasonic HC-X1000 shot videos to Avid DNxHD keeping the original quality. Besides Avid MC, this software can also export MPEG-2 or MOV for Premiere Pro, MPEG-2 Premiere Element, ProRes for Final Cut Pro, Apple InterMediate Codec for iMovie and more NLE systems for native editing. For Windows users, Brorsoft Video Converter is the alternative choice.

Tips Editing Panasonic HC-X1000 4K MP4/MOV in Avid Media Composer

Step 1: Load 4K footage to the converter

Run the best 4K to Avid Media Composer Converter and click “Add file” or “Add from folder” button, browse to the Panasonic GH4 footages and load them to the converter for conversion. You can check the “Merge into one” box to join several 4K files together.


Step 2: Choose a proper output format

Click “Format” bar to choose output format. You are recommended to choose “Avid Media Composer -> DNxHD (*.mov)” as the target format.


Tip: Advanced 4K video settings Click "Settings" button if you'd like to customize advanced audio and video parameters like Video Codec, aspect ratio, bit rate, frame rate, Audio codec, sample rate, audio channels. Note: If you want to get original 4K resolution, just keep the video size as original.

Step 3: Start converting HC-X1000 4K to DNxHD

When you finish all settings, hit “Convert” button to start transcoding Panasonic HC-X1000 4K video for Avid Media Composer on Mac. You can follow the conversion process from the pop-up windows.

After the conversion, it’s freely to import Panasonic HC-X1000E 4K MP4/MOV footage into Avid Media Composer for natively editing.

Additional Tips:

1. This professional 4K Video Converter Mac not only can encode 4K files to Avid MC, but also enable you to import 4K videos in MP4, MOV, XAVC, XAVC S, MXF, etc format to Final Cut Pro, iMovie, Adobe Premiere Pro, After Effects and more editing programs.

2. If you want to learn more tips and tricks about how to play, edit, convert and share 4K Ultra HD videos in Windows/Mac, please link to 4K Workflow.

See more:
Converting XAVC for Editing in Final Cut Pro 7
Blu-ray to H.264, MPEG-4 .mp4 Video Conversion
Import single mts/m2ts/AVCHD to Final Cut Pro 7/X
Transcode Sony PXW-X180 XAVC footage to FCP 7
Slove Compatibility issue with Sony PXW70C and Final Cut
Panasonic AG-AC90 AVCHD files to Premiere Pro CS5/CS6
Panasonic AG-AC160/130 AVCHD import to Adobe Premiere
Importing Panasonic AVCHD .MTS to Adobe Premiere Pro CC
Converting Panasonic AG-AC8 1080PAVCHD MTS for Premiere Pro CC

Saturday, January 3, 2015

JVC HM200 to FCP 7/X-GY-HM200E 4KCAM 4K(H.264)/MOV/MTS files to Final Cut Pro in Yosemite

Owning JVC GY-HM200 4K camcorder to enjoy 4K videos at home? But do you know how to edit them in FCP X or FCP 6/7?

JVC GY-HM200E (GYHM200E) 4K Ultra HD Live Streaming Camcorder

Fully equipped for any shooting scenario, the GY-HM200E is JVC's next generation camcorder. Whether you're shooting 4K Ultra HD, 4:2:2 full HD or streaming to the web, this camera does it all. Its integrated 12x optical zoom lens and 4K CMOS sensor deliver stunning 4K Ultra HD recordings directly to SDHC/SDXC memory cards. And the camera is totally professional, complete with dual XLR audio inputs, HD-SDI (3G) and HDMI outputs, and is equipped with JVC's dual codec Advanced Streaming Technology. Connect to the internet via optional Wi-Fi or 3G/4G modem and stream HD instantly to USTREAM or any other destination. No other camcorder comes close to delivering so much in a complete, well equipped package.

Video recording:

Video codec: MPEG-4 AVC/H.264 (4K/HD), AVCHD(HD/SD)

File format : MOV(H.264), MTS(AVCHD), 4K(H.264)

Final Cut Pro 7 or FCP X can not import and edit JVC HM200 4KCAM MOV(H.264), MTS(AVCHD), 4K(H.264) video clips, how to solve it ?


To achieve the goal, you need the help from Brorsoft Video Converter for Mac, a professional 4K Video to FCP Converter app. It is so great! It is not only professional on transcoding JVC 4K videos to FCP/iMovie/FCE/Avid for editing, but also can convert 4K UHD videos to common video formats for playing on portable devices and posting on websites. For editing, this powerful tool offers you particular Apple ProRes profiles for Final Cut Pro, AIC for iMovie/FCE, and DNxHD for Avid, so it is easy and convenient for us to use it. What struck me most is that I do not need to download or buy some cumbersome plug-ins, etc., that is too time-consuming, and use it directly, saving a lot of time and effort. For Windows user, Brorsoft Video Converter is here for you.

Simple steps to Edit JVC GY-HM200 4K H.264/MOV/MTS files in Final Cut Pro 7/X 10.10 Yosemite

Step 1: Load the 4K videos to the program

Download and install the 4K Video Converter, and then import the source 4K videos to it. To do so, you can directly drag & drop the files onto the main interface, or you can click the "Add" icon to locate the videos from your local disk.


Step 2: Set output video format

Click the "Format" bar and select Final Cut Pro> Apple PreRes 422(*.mov) as output format.


Tip: Click the "Settings" button and customize proper video/audio parameters including Video size, bitrate and fame rate and more. Usually 1920*1080 video size and 30fps video frame rate are recommended for FCP 6/7 editing.

Step 3: Begin to convert JVC GY-HM200 4K videos

When you finish the settings, you can press the big "Convert" button to kick off the conversion. By using this professional 4K to FCP 7 Converter, the conversion will be finished with ultrafast speed and the best video quality kept. After the conversion, you can then edit the JVC HM200 raw 4K in Final Cut Pro 7 smoothly.

More Guides:

Edit JVC 4K footage in Final Cut Pro
How can I solve MOV to FCP incompatibility issues
Import JVC GY-LS300 4K/HD clips to Final Cut Pro
JVC GY-LS300 4K videos/MOV files to Final Cut Pro
JVC 4K to Adobe Premiere Pro CC/CS6/CS5 Workflow
How to Import JVC GYHMQ10 4K .MP4/.MOV into FCP
Convert JVC GY-HMQ10 4K footage for Editing in Premiere
Efficient Way to Edit JVC GY-HM170 4K H.264 files in FCP
JVC GY-HM170 4KCAM H.264, AVCHD files to Premiere Pro CC
JVC GY-HM200 4KCAM H.264, AVCHD files to Adobe Premiere Pro

iMovie 11 MOV Editing Solution: Import MPEG-1, Xvid .MOV files into iMovie on Mac Yosemite

Did you get an error message that your mov file(QuickTime, MPEG-1, Xvid, etc) to iMovie 11 failed? Here you will find the best solution to make all MOV files compatible with iMovie 10/11 perfectly in Mac OS X 10.10 Yosemite.

Failed to playback your video files even when the MOV(QuickTime) file is uploaded to iMovie 11? Were you prompted an error message on your screen saying that the video files is unsupported when you tried to move, import or transfer the MOV file(QuickTime) to iMovie? Or sometime it shows the video but no audio, or the audio is just dead on the time line.

Although some MOV files like QuickTime .mov, H.264 .mov, or AIC .mov can be imported directly into iMovie, other MOV videos encoded like in MPEG-1, Xvid still can’t be imported into iMovie in a direct way due to incompatibility. Perhaps there is some required codec missing or it is an incompatible video file format. Why don’t you give it another try with Brorsoft Video Converter to convert MOV to iMovie compatible video format.

This is a powerful video converter, editor and player. It offers an optimized preset Apple Intermediate Codec .mov for iMovie for easy access. Besides transcoding MOV to iMovie supported videos with optimized settings while keeping the video quality, the all-in-one and easy-to-use toolkit can convert all other popular video formats like MPG, MP4, AVI, MXF, WMV, MKV, FLV, M2TS, VOB, etc. to iMovie natively supported video formats on Mac OS X (Mavericks and Yosemite included) with fast encoding speed. See how below about converting MOV files to iMovie format.

How to Convert MOV to iMovie supported videos

Step 1: Load MOV video files to the MOV to iMovie Converter program by clicking “Add” button, or drag the MPOV videos to the software directly.


Step 2: Click “format” bar to select “iMovie and Final Cut Express–> Apple Intermediate Codec(AIC)(*.mov)” as the output format for Mac iMovie.


Tip: Before conversion, you can click the “Settings” icon to customize the video/audio settings for iMovie. If you want to get a smaller ones, please decrease the video size from 1920*1080 to 1440*1080 or 1280*720.


Step 3: Click the Convert icon under the preview window, and the program will start transcoding MOV to AIC for iMovie 08/09/11.

When the conversion is finished, you can click "Open" button to get the generated AIC .mov files effortlessly. Afterwards, you can launch iMovie, and then choose File > Import > Movies to import converted MOV clips into iMovie for further editing.

More Guides:

Editing Sony XAVC files in Final Cut Pro 7
A tutorial on ripping Blu-Ray to MKV for free
Import MTS to YouTube with FLV/AVI format
Change AVI to MOV for playback on QuickTime
Import Sony XDCAM MP4 files to Final Cut Pro 7 easily
Tips working Sony XDCAM EX MP4 in Final Cut Pro 7
Edit Sony EX3 XDCAM MP4 files to After Effects CS6/CC