Tuesday, June 30, 2015

Import AJA Cion 4k videos to Edit in Adobe Premiere Pro CS6/CS5/CS4

In the following article, we learn how to properly edit and export 4K footage from AJA CION using Adobe Premiere Pro CC7/CS6/CS5/CS4.

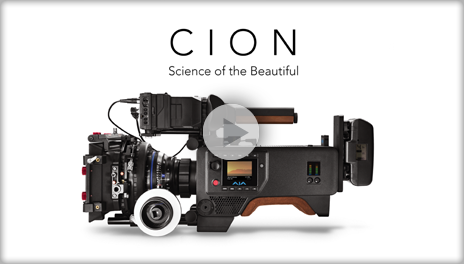
AJA’s CION is a new ergonomic professional production camera, capable of shooting at 4K/UltraHD and 2K/HD resolutions. CION offers in-camera recording directly to the Apple ProRes family of codecs including ProRes 4444, and ProRes 422 up to 4K 60 fps, and offers the ability to output 4K AJA Raw data at up to 120 fps via 4x 3G-SDI outputs. When recording in HD or 2K, the image is oversampled from the full 4K sensor, retaining focal length as well as providing a vibrant and detailed image.

AJA Video Systems announced its AJA Raw CION camera format can be supported in Adobe Premiere Pro CC, but it is extremely hardware intensive. On the other hand, it is a complete nightmare to import AJA CION 4K ProRes to Premiere Pro - it cannot recognize ProRes codec, and even worse than that is Adobe Premiere Pro(CC) will import a .MOV file of any codec -Animation/ProRes, whatever doesn't matter. Whereas, you will find it is a painful experience to import 4k ProRes to Premiere Pro CC(before 8.2.0) or CS6, CS5, CS4.


To solve the issues, you need to convert AJA Cion 4K video to MPEG-2 for Premiere Pro as primary delivery format. The process is surprisingly easy and can be done with the help of Brorsoft Video Converter for Mac. With it, you can effortlessly encode/re-encode AJA CION 4K ProRes footage for smoothly importing and editing in various non-linear editing systems (NLE), including Adobe Premiere Pro, Avid Media Composer, Final Cut Pro, iMovie, FCE and more. If you work AJA Cion 4K files in Adobe Premiere Pro on Windows, please get Brorsoft Video Converter. Below is the detailed guide on transcoding AJA CION 4K files to Premiere Pro friendly video formats.

PS: Refer to 4K Workflow column to get all-round solutions and workflows to play, edit, convert and share 4K Ultra HD videos in Windows/Mac.

Download AJA CION 4K Video Converter:

(Note: Click here for OS X 10.5)

Converting AJA Cion 4K files to Premiere Pro CS54/CS5/CS6

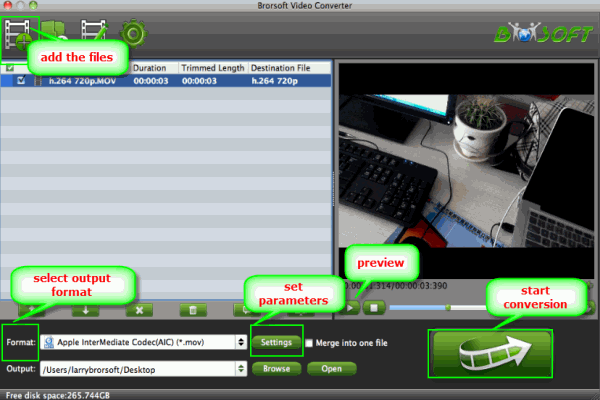
Step 1: Import source 4K videos

Run 4K to Premiere Converter for Mac and click "Add Video" and load your 4K video files into it. It also supports joining several videos into a single file.


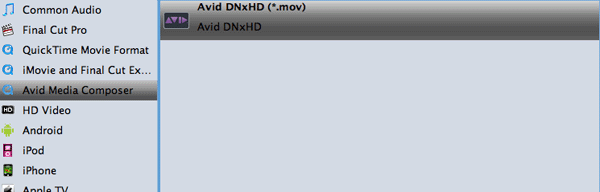
Step 2: Select the output format

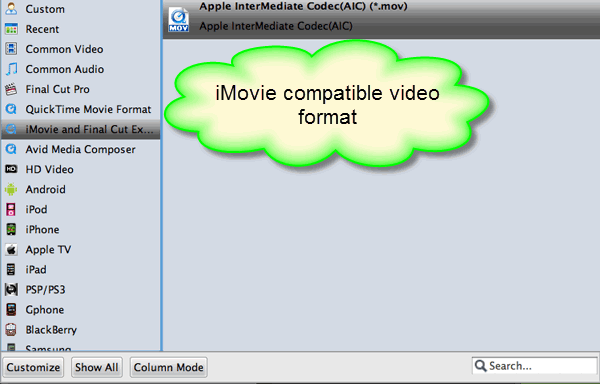
Click the Format bar to select output format- Adobe Premiere/Sony Vegas > MPEG-2 (*.mpg) for editing raw 4K in Adobe with natively supported video codec.


Tips: Click "Settings" button if you'd like to customize advanced audio and video parameters like Video Codec, aspect ratio, bit rate, frame rate, Audio codec, sample rate, audio channels. If you want to get original 4K resolution, just keep the video size as original.

Step 3: Start converting 4K footage

Click the "Convert" button to start the AJA CION 4K ProRes to MPEG-2 conversion.

When the conversion is finished, you can click "Open" button to get the generated MPG files effortlessly. Launch Premiere Pro on your computer, choose "File > Import to import converted AJA Cion 4K files in Adobe Premiere Pro CS5/CS6/CC for further editing.

More Topics:

Play Blu-ray Movies on Surface 3
How to Import 4K video to Final Cut Pro
Get the Best 4K Ultra HD Video Converter
How to Import 4K footage to Sony Vegas Pro
How to convert DVD to Surface 3 tablet easily
Converting TS videos to edit in Avid Media Composer
Edit Nikon D7200 video files in Windows Movie Maker
ngest XAVC S files to MPEG-2 for Adobe Premiere Pro CC/CS6/CS5/CS4
Transcode Sony PMW-F55 4K XAVC to Avid DNxHD for Avid Media Composer

Tuesday, June 23, 2015

Preparing Premiere Pro for editing an iPhone videos

Summary: Encounter problems while importing iPhone videos to Premiere Pro? This article will teach you how to edit iPhone videos in Premiere smoothly.


In order to deal with iPhone videos easily, Adobe has launched a version of its Premiere video editing desktop app for the iPhone and iPad called Adobe Premiere Clip as part of its overall app release plans for the iOS platform. However, if you directly import iPhone videos to Premiere Pro for further editing, you will meet some issues.

"Has anyone had experience editing with native iPhone video footage in Premiere? I've been reading about some people having 'sync slip' issues. Is converting the footage necessary?"

The problem with iPhone footage is it has variable framerate instead of constant framerate, hence the out of sync issue. To edit iPhone Videos in Premiere Pro (CC/CS6) smoothly, the easy workaround is to transcode them to a more editing-friendly format, such as MPEG-2. Brorsoft Video Converter for Mac is what you need, which is the one of the best iPhone video converters for Mac users.

It offers optimized presets MPEG-2, MOV(AVC) for Premiere (CC/CS6/CS5.5/CS5) with maximum editing quality and efficiency. Besides Premiere, it also offers professional codecs for other NLEs, like Apple ProRes to FCP, DNxHD for Avid, AIC for iMovie .etc. If you are a PC user, pls turn to Brorsoft Video Converter Windows version. Now, download the software on computer and follow the guide below to start conversion.

How to Make iPhone videos editable in Premiere Pro

Step 1: Add video files

Click "Add" button on the top of the main interface to load iPhone videos. Or you can simply drag&drop the videos directly to the software.


Step 2: Choose output format

Go to "Format" pull down list to select Adobe Premiere/Sony Vegas> MPEG-2(*.mpg) as the best video format for Premiere Pro. WMV, MOV formats in this column are the good choices as well.


Tip: Click the "Settings" button, you are able to enter the "Profile Settings" panel to adjust video and audio parameters for the converted files, including video size, bit rate, frame rate and more.

Step 3: Start conversion

Tap the Convert button to start transcoding iPhone MOV videos to MPEG-2 for Adobe Premiere Pro.

Once the process completes, you can find the generated videos via "Open" button, then you can transfer the encoded iPhone videos to Premiere without issue.

Related posts:

How to open iPhone videos in Sony Vegas
How to Edit iPhone Video in Premiere Pro
Editing iPhone Videos in Pinnacle Studio
Importing Blu-ray to Avid Media Composer 5/6/7
How to Make iPhone videos editable in Premiere Pro
Simply Copy Blu-ray movies to Surface Hub for playing
4K MXF/MOV/MP4 to Avid Media Composer workflow
Tutorial: How to convert AVI to QuickTime MOV on Mac

Thursday, June 18, 2015

Importing & Editing AVI in iMovie(Yosemite)

Summary: If you are puzzled by the problem that you can’t import AVI to iMovie directly, here recommend you the best AVI to iMovie converter to solve the incompatible problem.


You may get some AVI files and need to add these AVI files to iMovie for editing on Mac(Yosemite). However, when trying to import AVI to iMovie, only to find that there are many issues always around you. Let’s look at the following problems many happen:

1. AVI plays smoothly in QuickTime, but in iMovie, I get audio but no picture.
2. Import AVI clips into iMovie, but when play them, there's an image but no sound.
3. Imported an AVI file to iMovie, and it goes through the copying process, but nothing shows up on screen.
4. AVI played just fine in QuickTime, but they "grey out" in the import window.

These are the common problems encountered by many users who wanna use AVI files in iMovie. As a matter of fact, iMovie only reads AVI that both the audio and the video were compressed by using a codec that iMovie can recognize. If your AVI video files are not imported, it's because of the codec used to create the AVI file is not supported by iMovie, even if you have Perian installed, which only allows you to play AVI in QuickTime. If you want to edit AVI in iMovie, the easy option would be converting AVI files to iMovie compatible format, like Apple InterMediate Codec .mov.

The article would show you how to change AVI to iMovie editing-friendly format step by step with a professional Video Converter for Mac from Brorsoft, buy running it, there’s no need to set the codec yourself: the program has optimized presets for iMovie. Besides AVI, you can convert any video file like WMV, FLV, VOB, MPG, MKV to iMovie compatible format without loosing quality.

Guide: How to convert and import AVI files to iMovie

Step 1. After downloading, install and run this AVI converter for iMovie, just drag the AVI files to the software for converting.


Step 2. Click the format bar, and move mouse cursor to "iMovie and Final Cut Express -> Apple InterMediate Codec (AIC) (*.mov)".


Step 3. Finally, hit the big Convert button on bottom of the main windows and the conversion from AVI to iMovie will begin immediately.

More features of AVI to iMovie converter:

Adjust audio and video settings (optional)

The Mac video converter enables users to adjust audio and video settings before transcoding AVI to AIC .mov. Click “Settings” button, then you will enter the following interface, on which you are allowed to customize size, bit rate, frame rate, sample rate, and audio channel to your required ones.

2. Basic video editing (optional)

This Mac video converter has some simple edit functions like cropping, splitting, adding effects etc. so you can touch up the video with basic video editing functions.

After the conversion is complete, get the resulted files via clicking the Open button and then you can import converted AVI files to iMovie for further editing without any hassle.

Related guides:

How to Add AVI files to Adobe Premiere
FFmpeg can't convert ProRes to MP4- SolutionTransfer ProRes to MP4 for Mac OS X (Yosmite) How to Convert and Import AVI to Final Cut Pro Encode AVI videos to AIC .mov for iMovie editing Batch convert MKV/VOB/AVI to Nexus 7/Nexus 10 How to convert videos on Windows 8.1 fast and easily Guide for Converting Video on Windows 8.1 with ease How to Convert and Import AVI to Avid Media Composer Convert H.265 to Premiere Pro CC/CS6/CS5/CS4 on Mac OS X

Monday, June 15, 2015

How to convert XAVC MXF to ProRes on Mac OS X

Summary: Wanna know how to import XAVC MXF footage to Final Cut Pro successfully? This page will show you the best way to get XAVC MXF to FCP by converting XAVC MXF to ProRes.

I can not get Final Cut Pro to recognize the MXF /XAVC files from a new Sony FS7. Searching online, more than one guys are talking about the XAVC/MXF issues with FCP 7 or FCP X. Searching further, I got more info about XAVC. XAVC is designed for moderate data rates of high resolution, high frame rate material (50p frame rate, 50p and 4K), with an industry standard .MXF file wrapper for use in conventional production workflows. But the problem is, XAVC is not widely supported by NLEs including Apple’s Final Cut Pro(until FCP 10.1.4 supports native XAVC MXF import). For faster and fluid XAVC MXF to FCP workflow, a better way is to convert XAVC MXF to ProRes.

To get things done easily, you can pick up the professional XAVC converter app Brorsoft Video Converter for Mac, to convert XAVC to "a codec"- Apple ProRes that FCP can read more easily. With it, you can also effortlessly encode/re-encode XAVC files for smoothly importing and editing in various non-linear editing systems (NLE), including Final Cut Pro X, FCP 6/7, iMovie, Final Cut Express, Adobe Premiere Pro, Avid Media Composer, etc. Download the program and follow the XAVC to ProRes conversion process.

Guide: Convert XAVC MXF to ProRes 422, 4444 for Final Cut Pro

Step 1. Download, install and run the XAVC to ProRes Converter; click "Add Videos" icon to load your source XAVC files. This software supports batch conversion.


Step 2. Click “Format” bar and choose “Final Cut Pro >> Apple ProRes 422 (*.mov)” as output format for editing XAVC in FCP with natively supported video codec.


Tip: Click the Settings icon if you’d like to customize advanced audio and video parameters like Video Codec, aspect ratio, bit rate, frame rate, Audio codec, sample rate, audio channels.


Step 3. Hit the convert button, it will start converting XAVC MXF to ProRes .mov for importing to Final Cut Pro 6/7 and FCP X immediately. Soon after the conversion, just click “Open” button to get the generated files for natively editing in Final Cut Pro perfectly.

Related Guides:

How to convert AVI to iTunes free on Mac
Smoothly Editing XAVC S in Final Cut Pro 7
Edit DivX/XviD in Movie Studio Platinum 12/13
Solution to Sony Movie Studio can't open AVI files
How to Upload XAVC/XAVC S Files to YouTube
How to Import XAVC Files to Adobe Premiere Pro
Editing MP4 in Sony Movie Studio Platinum 12/13
How to Work XAVC Clips in Sony Vegas Pro 13/12
Transcode XAVC MXF to ProRes 422, ProRes 4444
Transfer Xvid, Divx codec AVI files to iTunes 12/11 for Playback
Convert Avid DNxHD to Prores 422, ProRes 422 HQ or 4444 with OS X
Edit GoPro Hero2/Hero3/Hero 4 footage in Sony Movie Studio Platinum 12/13

Monday, June 8, 2015

MKV to QuickTime MOV- How to Successfully Play MKV in QuickTime on Mac/Win (Windows 10)?

When mentioned QuickTime MKV, a large number of QuickTime users reflexively asked "Can QuickTime play MKV video files", "Does QuickTime play MKV files in the latest OS X 10.10 Yosemite or 10.9 Mavericks", "Why my QuickTime won't play MKV videos"... This article aims to answer these questions clearly and also introduce an ideal way to play MKV in QuickTime.

MKV (Matroska), a popular video format among movie fans, supports multiple video and audio codecs and contains several subtitle tracks in one video file. Perhaps you have got some MKV videos and would love to play these MKV on your QuickTime, iTunes, or import MKV files to iMovie, FCP for further video editing...

As a great open-source QuickTime component, Perian is the saver to allow QuickTime to play all kinds of MKV videos for Mac users. Unfortunately, the latest version 1.2.3 of Perian is not compatible with Mac OS X Yosemite (10.10) Mavericks (10.9), Mountain Lion (10.8) and Lion (10.7).

In order to solve "QuickTime won't play MKV" on Mac and Windows (Windows 10 included), it is best to convert MKV to QuickTime more popular formats like MP4, MOV with some professional MKV to QuickTime Converter.


In fact, there are many kinds of MKV to MOV converter software in the market. The output video quality and the converting speed must be the key factors that you should be looking out for. Here this professional yet easy-to-use tool- Brorsoft iMedia Converter for Mac is highly recommended to do the MKV to QuickTime MOV Mac converting task.

This MKV to MOV Converter can help you to change MKV videos to QuickTime format (MOV), loading as many files as you want and convert all at the same time. Besides MKV, it can also convert AVI, MP4, VOB, WMV, MPG, MTS and FLV, etc to MOV or any other file type as you need. It also provides powerful editing functions and gives a full support to Mac OS X Mavericks and Yosemite. Well, for those who wanna convert AVI to QuickTime .mov on Windows(10), please turn to Blu-ray Video Converter Ultimate to get the work done.

Download the MKV to QuickTime Converter:

(Note: Click here for OS X 10.5)

How to Convert MKV to MOV for playback on QuickTime

STEP 1. Load MKV files

Launch the MKV to QuickTime Converter Mac. Drag & drop MKV files to the program directly and your files would be added instantaneously. Or you can head to the "Add" button to locate the MKV videos you want to add.

Tip: If you want to convert the video files at one time, you can apply the batch conversion by adding several files at a time.


STEP 2. Set output format

After importing your MKV files, you can choose the output format. Click Format bar and select "QuickTime Movie Format" as target format. "MOV- QuickTime(*.mov)" from the "Common Video" is also an optimal choice.


Tips: If your output files are pointed to certain media player, editing software or portable devices, you can choose a decent output format from the provided profile list. For example, if you want to play MKV with QuickTime and finally edit MKV in iMovie, you can directly choose "iMovie/FCE --> Apple InterMediate Codec(AIC) (*.mov)" as the target format.

STEP 3. Start to convert MKV to MOV Mac

After the above steps, click the "Convert" button to start MKV to QuickTime .MOV conversion. You could view the conversion progress and are able to cancel the converting process at anytime.

When the conversion is done, you can play the output MOV videos in QuickTime, edit them in iMovie, Final Cut Pro, or put them on your iPhone, iPad for playback whenever you like. Enjoy.

Related posts:

How to convert MKV DTS to AC3 5.1
How to import .MKV files to iMovie
How to Play AVI files on OS X Yosemite
Editing with Canon XF205 footage ini FCP 6/7/X
How to Edit Sony PXW-X320 XAVC files in Avid
Convert TiVo shows to MOV for playing in QuickTime
How to Convert and Import AVI files to iTunes on Mac
How to Convert and Import AVI to Windows Movie Maker
H.264 in AE - Easily Work with H.264 files in After Effects
Add subtitles to AVI natively - Merging SRT with AVI files

Friday, June 5, 2015

How to Get Avid MC (5.5/6.0/6.5/7) Work with Panasonic DMC-G7 4K MP4, 1080p AVCHD

From this article, you can learn the best way to import Panasonic Lumix G7 video into Avid Media Composer (5.5/6.0/6.5/7) by transcoding 4K MP4 and 1080P AVCHD to Mac and Windows Avid MC editing software supported video format.

The G7 is the first G-series camera to shoot 4K videos. Although this capability isn’t new to Panasonic cameras, the G7 is the first to introduce 4K Photo mode. With 4K video, it’s possible to extract an 8-megapixel still. This is useful for action shots, because it lets you record the scene without having to worry about when to press the shutter button; once you’re done shooting, you can go back and find the shot you want (you can do that with a Full HD 1080p video, but, depending on the quality, the most you’ll get is a 2-megapixel photo). On the memory card, all you’ll see are 4K videos saved in MPEG-4 format. You can use Adobe Photoshop or Lightroom to extract stills in the meantime, but you don’t get any of the metadata.

Actually, currently 4K MP4, 1080/60p or 1080/50p footage is a very non-standard format and it’s unsupported in Avid Media Composer.So if we want to edit Panasonic DMC-G7 4K MP4, 1080p AVCHD files in Avid smoothly, the easy workaround is to use 3rd-party conversion tool to rewrap and convert Panasonic G7 footage to a more “editable” format in 1080p for Avid MC.


Brorsoft Video Converter for Mac, which is an easy-to-use yet professional 4k Video Converter in Mac OS X. With it, you can effortlessly transcode Panasonic DMC-G7 4K video clips or 1080p AVCHD to DNxHD encoded MOV files, which will create an Avid MC friendly file format keeping the original quality. Besides Avid, this software can also export MPEG-2 for Adobe Premiere Pro, ProRes for Final Cut Pro, Apple InterMediate Codec for iMovie and more NLE systems for native editing. If you meet the 4k issues on Windows, please get Video Converter. Download it and follow the guide to convert Panasonic G7 footage to DNxHD.

Download the Panasonic 4K MP4/1080p AVCHD Converter:


Guide: Trancoding Panasonic 4k MP4 or 1080p AVCHD files to Avid Media Composer

Step 1: Load Panasonic G7 media

Install and launch the Panasonic MP4/AVCHD to Avid MC converter. Click Add button to load individual videos for converting.


Step 2: Decide output format

You just need to go to "Avid Media Composer -> DNxHD (*.mov)" as the best video format for editing Panasonic G7 in Avid as well as good video quality.


Tip: You can also click Settings to fix the frame rate, bitrate, audio and video quality to your needs. And as far as we know, 4K XAVC footage is not currently supported well in Avid, downsize the video size to 1080p is a wise choice. Of course, you can stick with your 4K footage if you want.

Step 3: Start 4K MP4, AVCHD to DNxHD conversion

Hit "Convert" button to start converting Panasonic DMC-G7 footage to DNxHD .mov. You can follow the conversion process from the pop-up windows.

After the conversion, you can import the converted Panasonic DMC-G7 video files to Avid Media Composer (5.5/6.0/6.5/7) for smooth playback and editing. No more worries about the Panasonic DMC-G7 incompatibility with Avid Media Composer.

More Topics:

Easy way to copy DVD, Blu-ray movies to PS3
Editing XAVC S in Adobe Premiere Pro CS6/CC
4K QuickTime: How to Play 4K Videos in QuickTime
Accidentally deleted contact on iPhone 6/iPhone 6 Plus
Panasonic GH4 4K Workflow with Adobe Premiere Pro
4k video clips from Panasonic DMC-G7 to FCP Workflow
Importing Panasonic AG-DVX200 4K MP4/MOV to FCP 7/X
Editing Panasonic DMC-G7 4K video in FCP/Premiere/Avid MC
Panasonic HC-X1000 4K Workflow with FCP 7/Adobe Premiere
Edit Panasonic DMC-G7 4k video to Premiere Pro CC 7/CS6/CS5/CS4

Monday, June 1, 2015

Import TS to iMovie & Edit TS with iMovie 11/10/09 in AIC MOV format

This guide introduces TS file and shows how to convert TS to AIC MOV for iMovie on Mac OS X (10.10 Yosemite & 10.9 Mavericks included), so you can edit TS video on iMovie 11/10/09 smoothly.

TS, Transport Stream, is a MPEG-2 video file and very wide spread on the Internet nowadays. TS recodes television broadcasts in high definition. And TS is also a video stream format used for storing video on DVD. If you got a bunch of files end with .ts extension and want to edit TS with iMovie, the best way to edit your TS files on iMovie will be converting them to formats that are perfectly supported by iMovie.


To get the work done, you can take Brorsoft Video Converter for Mac, which is one of the best TS to iMovie converter tool for you. The program comes with optimized format for iMovie, which enable you to transcode TS to AIC .mov for using in iMovie directly without any rendering or codec problems. Plus, it also allows you to convert TS to ProRes for FCP, DNxHD for Avid Media Composer, etc editing with best results. Download it and follow the tutorial below to convert TS files to iMovie on Mac(Mavericks, Yosemite).

Convert and Import TS Files into iMovie

Step 1: Download, install the top TS converter on your Mac. Click Add to import the TS recordings to the program for converting.

Tip: Check the “Merge into one” box, you can join several .ts files together.


Step 2: You can directly choose the preset- iMovie/FCE --> Apple InterMediate Codec(AIC) (*.mov) for iMovie which has been supplied by the converter. The Mac program has some simple edit functions like cropping, splitting, add effects, etc.


Step 3: Click “Settings” button if you’d like to customize advanced audio and video parameters like Video Codec, aspect ratio, bit rate, frame rate, Audio codec, sample rate, audio channels.

Step 4: Click convert button to start encoding TS to AIC .mov for working with iMovie on Mac.

After the conversion, click the "Open" button to get the output files and then launch iMovie, choose File > Import > Movies…, to import the converted TS video into iMovie; prepare for editing.

With the TS to iMovie converter, you can easily encode TS files to iMovie for editing. This software runs fast, so you can convert your source TS footages to iMovie(11) in less time, and video and audio synchronization is perfectly guaranteed.

Related Guides:

How to Play Video_TS Files on Mac
How to copy DVD files to USB Flash Drive
How can I load Video_TS files into iMovie
Transfer MKV videos to PS3 for entertainment
How to move DVD movies to Windows 8.1 tablets
How to Convert VIDEO_TS Folder to MKV Video Files
Sony PXW-X200 XAVC Workflow with Avid Media Composer
How to Import MediaPortal TS files into FCP, iMovie and FCE
Concatenate/Transcode AVCHD(mts.m2ts.ts) to Kindle Fire on
Convert AVCHD 50p files to 25p with MPEG-TS HD output format
How to Import ALEXA Mini 4K to Premiere Pro CC/CS6/CS5/CS4